

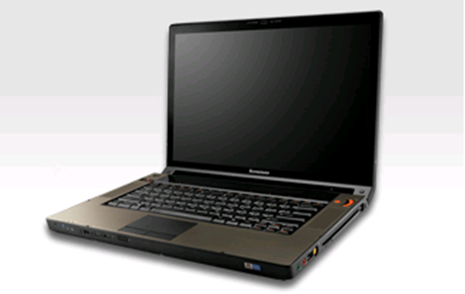
What would you do if your Windows XP system locks up? The problem I had is explained in my "YouSayToo" blog. In my case around a week ago, after trying to find the best solution and saving back up of my data from my notebook Lenovo 3000 Y400 Type 9454-25A to a DVD, I determined to reinstall the whole system from zero (clean install) with the provided original Windows XP Home Edition SP2 and the drivers from Lenovo. I also intend to use its marvelous "One-Key Recovery" to save me from disaster later on. But I do not hope it will happen again :-) The smooth steps in brief are as follows:
- Clean install windows by erasing all the existing partition on the hard drive of the notebook may have and assigning it as one big partition on whole hard drive as C:\ . Installing window is quite straightforward. You must make the notebook boot up from your system CD. Just follow the procedure including formatting the partition, filling in some entries and then installing and setting up the system which can be done without your attention or interfering.
- After finishing the installation and setup by the robotic acts, you may give your personal touch on some parts of the system. In my case, I disable some services that are not necessary and may make your system less secure, set the environment and look-feel according to my preference plus set the system for best performance option such as disabling CD autorun etc in my case.
- Then I install all the drivers for this kind of Lenovo in the right order and right choices as stated in its manual as follows: Chipset Driver 945GM, Graphic Card Discrete NVidia, Sound Card UAA driver firstly and then Audio setup, Foxconn Bluetooth 2.0 Plus EDR/Broadcom 2045 Bluetooth 2.0 USB Device (after enabling it firstly and you must install it by running D:\WinXP\Bluetooth\Setup.exe from driver CD otherwise all the bluetooth drivers are not installed correctly - it means that you cannot install it by just inserting the CD when the device found icon appears or when windows asks you to give the driver after autodetecting), Agere Systems HDA Modem, Energy Cut, LAN Card Realtek RTL8139/810x, Intel PRO/Wireless 3945ABG Net driver using "Intel (NET w3x32) net / Intel (w29n51) net" (also after turning it on - running from driver CD D:\WinXP\Wireless Lan\INTEL\DPInst.exe), Touchpad driver for Discrete Graphic Card, Card Reader RICOH R5C832/843 Flash Media Driver, and the last Easy Button Driver (discrete) for custom buttons on laptop. The process is long and time consumed because you have to restart for each installation. NEWLY REVISED!
- Now you can shutdown the complete and clean system. Then turning the notebook ON with "One-Key Recovery" button at exactly the left side of the power button. It will bring you to a custom screen with only 4 choices: make a backup partition image, restoring the whole partition to the last backup, clearing / deleting the saved backup, or exits the screen and brings you to normal boot-up. Please make a backup image so that you can use it if there is a disaster. You can have a clean install system again complete with already all its drivers in just a few minutes without going through step 1-3
- My clean system can now be updated to service pack 3 (SP3) and other further updates such as drivers updates for LAN etc. I have to update the system to SP3 because I need WPA2-PSK for relatively securer wireless connection to a wireless router, in this case Linksys WRT54G. I am a bit disappointed with Linksys WRT54G Version 7 because its firewall setting is not clear or strange and not the same as mentioned in the manual (there is no inbound traffic policy). The configuration is a quite tiresome (a fail product?). You had better choose Netgear WGR614 than Linksys WRT54G.
- The system needs protection from the beginning. Install a good firewall and anti virus plus anti spyware in order. In my case, I install "Comodo Firewall Pro with Defense+". You may not install the Defense+ so that you use Comodo firewall feature only because the Defense+ is a little bit chatty, many interruptions especially during learning phase. If it is so, you should not select Defense+ at the beginning of setup. I set the firewall mode of network defense to 'safe mode" and proactive defense+ to "clean pc mode". If you want to use this "clean pc mode", you must be sure that your clean install of system is free of malware from the beginning. Setting and tuning it up, then install "AVG 8 Anti Virus + Anti Spyware plus E-Mail Scanner". Setting up e-mail scanner in AVG 8 is a little bit tricky. If you do not set the rules in firewalls and the pop3/smtp server in AVG correctly, the e-mail scanner won't work. AVG acts as a proxy between e-mail clients such as Outlook Express (which I use due to its simplicity) and the pop3/smtp server at gmail or yahoo mail in my case for instance. I will post the procedure if anyone needs it. NEW! I have post the procedure of AVG8 personal e-mail scanner configuration in this blog...
- After running both firewall and anti-* smoothly, scanning your entire hard drive and tuning your windows system, you may continue to install other useful software or freeware as I have mentioned in my updated previous post. Firstly I install CCleaner, Mozilla Firefox and Addons including McAfee Siteadvisor, Adobe Reader, OpenOffice and HijackThis. Configure them one by one up to your preference and judgement
- Last step is reinstalling my file backups to "My Documents" only so that the files will not be shattered around causing them difficult to find. At this time, you may also install the drivers for external devices that will be attached to the system such as printer, scanner, or Nokia PC Suite etc. You may also install these driver at step 3 above, so that these can be updated too if the new ones available at windowsupdate. Then running HijackThis and looking for funny or suspicious signs. I hope not to see those in future time though :-)
That's it for now. Just a brief one. Later I will post the setting of Comodo Firewall Pro with Defense+ and personal e-mail scanner of AVG 8. Any comments or even critics, please welcome dude!


4 comments:
I just get an e-mail from Ian Budhy about his problem with one-key recovery. Unfortunately he might not comment on this blog due to "setting mistake" for comments :-) so that he sent it to my e-mail. Anyway I have fix the comment setting. I will share the question and the solution here:
His first message:
Dear Rudy,
I read your article on your Lenovo 3000 Y400 Type 9454-25A
http://www.yousaytoo.com/rdy/system-crash-new-clean-install/8583. My
brother has a similar laptop and we are trying to use the One-Key
Recovery to restore the laptop to factory settings. Unfortunately he
has meddled with the system partition and now everytime the backup
image is about to be restored it always says: System Partition Not
Match. I figure we need to resize the C partition to its default size.
Could you please look into your Lenovo and tell me what is the default
size for the C partition (Exact size is fine, but it would be better
if you can note the sector size as well). Thank you so much for your
help.
Regards,
Ian
My reply to him:
Dear Ian,
Sorry for late answer. I frequently check my own rather than the one in YST. I guess the explanation in my blog is much better than the one in YST. you may check it there http://rdy888.blogspot.com/2008/07/system-crash-clean-install.html/
So i will refer to that article to discuss the problem
as you can see at step no 1, it is just a straightforward and simple action. i did not use any tools for partitioning other than from the windows / installer cd from lenovo itself (the original cd from lenovo). just follow the steps the windows prompt you to do.
But for your own reference, i check the size of the C partition (the only one i have, i guess the one-recovery partition is hidden by the system) by Disk management of windows OS. the size is about 93.15GB NTFS.
Please take note that i do all this without any software tools other than from the original installer cd. you can erase all the existing partition on the disk by using the installer CD. just follow the steps when it prompts you.
Please let me know whether this reply can help you or not. Make any reply and question to me by visiting my blog at http://rdy888.blogspot.com because i check it quite frequently than the one in YST
Good luck...
Best regards,
Rudy
His first and last response:
Dear Rudy,
Thank you for your help. You're right, I only needed to destroy the C
partition (did it from a bootdisk - the Recovery CD wouldn't let me
delete partitions) then ran One-Key Recovery again where it detected
no primary partition and offered to rebuilt the original partition. I
wonder why Lenovo didn't just make the OKR to offer deleting the
mismatch partition and rebuilt the original one in one go...
Again, thank you so much for your help!
Regards,
Ian
That's all. So if you have any further comments, please send it to me by using "post a comment" at the bottom of the article. Thanks...
I cant download anything after doing a clean install of my computer. How do i fix this?
Hi Brad Fallon,
Sorry for the late reply..
To do the clean install, you should have the original System CDs (Window XP SP1 and Drivers) from Lenovo. It is a must! Please read it in my blog carefully. It is stated in the first paragraph and also point number 1.
Erase all your partitions. Please read the instructions carefully as depicted in the blog.
Make your laptop to boot from CD by selecting it from BIOS menu.
Insert your system CD and boot your laptop from it. The rest of the instructions are written clearly... just follow...
Let me know if you can do it :-)
Hi Brad Fallon,
BTW, is your laptop Lenovo 3000 Y400 Type 9454-25A?
If it isn't, the procedure may have different points as described in the blog.. It depends on the type of your laptop, the availability of your system drivers and operating system, etc...
Post a Comment